Microstation Presentation
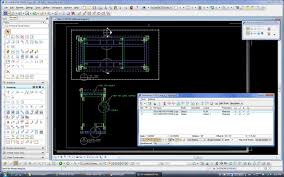
Majority of new work carried out by this office is on CAD, and we have to ensure that every drawing produced in this office is consistent and error free. To ensure this a CAD guidelines are produced and all are requested to follow.
Initial Quality Check
All source records on CAD, on receipt from NRG, shall be quality checked by Doc Controller before saving it in Project Drive.
However, all CAD producers shall also do an initial quality check by switching “ALL ON” (including construction lines, data fields and connect points) before starting any design on these CAD files. This is to ensure that no unnecessary elements are lying inside and outside the border of the CAD file.
File Names
File names for all source records will be in the 8.3 character format(i.e. maximum upto 8 characters.dgn) and shall be named with the diagram sheet number, e.g. 01.dgn.
File names for other documents(other than source records) such as scheme plans will be the same as the drawing number, e.g. 03_SS_006_A.dgn, where ‘A’ is the Version of the plan.
Microstation Workspace
To ensure that the correct fonts are used, in the “Workspace” selector on the Microstation Manager window, select ‘Atkins_Wiring’ as project for all wiring, control tables, schematics, etc. For all plans, select ‘plans’ as project.
The correct workspace must be used in order for the font spacing & font character set to be correct. The ‘plans’ use the font character set supplied to Atkins along with the original ‘plans’. For all drawings, select ‘ATKINS’ as User and ‘RailSig’ as Interface
Fonts
Scheme plans and Loc plans are to be drawn using font 1. All other diagrams are to use Adtranz font 50.
Text Size and Line Weight
Generally all wiring diagrams and schematics are to use a text height and width of 2:0 and be drawn using line weight 0.
For Control tables, text and lines added as controls will use text height and width 2:800 and line weight 0, while the Control table itself shall be at line weight 1. This is to make the controls standout from the rest of the sheet.
Borders
Where work is being done on existing CAD drawings and no border is found in the file, appropriate border cells should be placed at coordinates 0,0 and the existing graphics to be moved into it.
The NetworkRail border cells are located in:-
S:\Cadapps\cells\C&S\NetworkRail\Network rail.cel
Test Block
The tester’s signature block is required normally in all sheets, but in some project this may not be required.
Drawing Numbering
Drawing numbers will follow NRG requirements as shown in Appendix ‘A’ or as per the project requirement and will be made up of Area code/diagram type /location number/page number. Leading zeros shall be used for the page number, e.g. NUT/11/105/7/001, MPS/10/001, RSC/11/0038/HN56M163/A01. Control tables shall use the route name as the page number, e.g. MSC/05/R4228A-1.
Temporary drawings shall be numbered adding, “TEMP” as prefix to the sheet number. i.e temporary drawing for sheet no 10 shall me given a number NUT/11/105/7/TEMP10 and “TEMPORARY SHEET” should be mentioned in the Title Box.
Scheme Plan number shall be taken from the Doc Controller duly entering in the register maintained for this purpose and will be in the format 03-SS-034.
Plans
Scheme Plans & Signalling Facilities Diagrams (SSP & SFD)
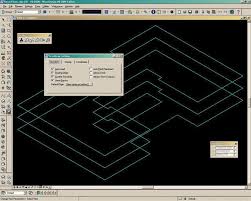
Scheme plans can be produced using an intelligent ‘Plans’ software available from approved suppliers in the industry. Selecting Plans from Start/Programs/CAD Tools, or alternatively, setting the Project to Plans in Microstation Manager automatically sets all of the required directory paths.
Seed Files
The seed file used for plans is plseed2d.dgn which has plborder.dgn attached as a reference file. The Plans software contains functions to modify the height and length of the border and references these two files.
Level Convention
The level convention shall be followed.
Cell Library
The Cell library for use with the Plans software is S:\Cadapps\cells\plan\wsplan.cel.
Checklist
All the CAD Producers shall ensure that the drawings produced are checked as per the check list and the same shall be put up along with Independent Checking copy.
Plotting
Plotting from the design file
Microstation plot drivers (.plt files) are provided for all standard plotting requirements. The drivers are stored on the server in the following location:- J:\Config\CAD\ustn\workspace\site\plotting\Drivers
Plotting
Batch Plotting
To summarise: –
- Open the ‘BatchPlot’ Dialogue box
- Add the drawings to plot (N.B. the same drawing may be added more than once for multiple copies)
- Highlight the Drawings for plotting and send to the Printer.
The screen will flash briefly for each drawing opened and the number of successful (or failed) plots will be recorded in the status bar. When BatchPlot is shut down a warning will appear ‘Cannot Create File…………… Permission denied’. This is normal and can be ignored.
Cell Management
Existing Cell Deficiency
In case any deficiency is found in the existing cell that should be reported to the Doc Controller. Doc Controller shall nominate one ‘Cell creator’ to update the cell and follow the same procedure used for emergency cell creation.
Cell Conventions
* All cells should be drawn using existing cells and to current Network Rail standards such as RT/E/C/11205 and RT/E/C/11004 whenever possible.
* All cells must be production and independently checked for technical errors. This ideally should be done by the producer and independent checker who will be checking the design in which the new cells will used. The cells should be then be forwarded to Birmingham through Doc Controller with signed checking copies, where they will be file fixed and distributed to all sites in the Emergency Cell Library.
* The wiring cells in the Emergency Cell Library will be moved to the appropriate Atkins Wiring Libraries at regular intervals.
* All cells will be version controlled from Birmingham using the master index spreadsheet. Versions will be in the form of Atkins 1.0 and will increment 1.1, 1.2 and so on.
Note:- Always use the correct command for placing circuits located on the Atkins Wiring palette as this DROPS the circuit down to the correct level automatically to enable you to amend the circuit and edit the various fields. Finally placing individual components to complete the sheet.
Once all the components are in place and in line, See item 9, then start to place your wires. Don’t ever place components on top of wires.
Always place circuits and components on the grid point not between. NEVER DROP CELLS if you feel this is necessary then something is wrong.


